
Ribs are a staple of summer barbecue – and for good reason. They’re tender, succulent, and fun to eat. They’re delicious and delightfully messy. Ribs belong at the family barbecue table.
Pulled pork and brisket are great, but they can be a huge pain to cook. Ribs are actually pretty simple. Unlike pulled pork or brisket, you don’t even need a smoker for ribs. Sure, a smoker helps a rack of ribs reach its full potential, but you can make a perfectly good rack on a gas grill. Or in the oven. Ribs require minimal effort and no special equipment. All you need is some time.
Jump to RecipeBreaking Down Ribs
I did tests on a bunch of ribs and have them down to a pretty solid science. I’ll show you how to make them with minimal effort.
First, you’ll want to choose some ribs. The two primary choices are baby back ribs and spare ribs. Baby back ribs tend to be meatier whereas spare ribs tend to be a bit fattier. I think the extra fat makes the spare ribs taste better, but it’s down to personal preference. You can use either back ribs or spare ribs for this recipe.
NOTE: Do not butcher your rack of ribs into smaller sections. Ribs cook better as a whole rack. I did it for testing purposes, but you should really cook them as a full slab.
Brining the Ribs
First, you’ll want to brine the meat. Most brines are a saltwater solution, but I really prefer a dry brine. It’s slightly easier and it creates better food. You should brine the meat for 1-24 hours. 1-2 hours is plenty, but you can do whatever best fits your schedule.
To brine the meat, evenly sprinkle a thin layer of kosher salt across all surfaces of the meat. You’ll want to use about 1 tsp of salt per pound of meat. After you apply the salt, lay the ribs on a baking sheet and put them in the fridge, uncovered. Leave them in there for 1-2 hours.
You could skip this step, but the ribs will be notably less tender. If you’re already spending 4-6 hours on ribs, what’s another hour…?
The Rub
After brining the meat, you’ll need a rub. Pork is a great base for flavor, but it definitely benefits from a boost. A rub is the best way to add flavor and texture to ribs. If you have a favorite rub, use that. If not, I have a couple suggestions.
For a sweeter rub, I recommend Memphis Dust.
For a spicier rub, I recommend Magic Dust with the salt removed.
Whatever rub you use, I recommend leaving out the salt. By brining the meat, you’ve already added a significant amount of salt. Adding more in the rub is just overkill. You can always add more at the table or in the sauce, but you don’t want to spend hours cooking ribs to learn they’re too salty when they hit the table.
Once you’ve chosen a rub, Lay your ribs out on a baking sheet and apply a good coat of the mixture to all sides of the meat. If you have a spice shaker, then this is a good time to use it. If you don’t have a shaker, then just sprinkle it all over the surface.
A lot of people will apply a thin layer of mustard between the meat and the rub. It can help the rub stick to the meat and add an extra bit of flavor. I usually do it if I remember. I honestly just forgot here.

Make sure to really apply a good layer of the rub and get it well into the meat. You spent all that time making that rub, you definitely want to taste it.

Now that the ribs are all rubbed and ready, it’s time to think about foil.
Foil? – Yes.
One of the primary things I tested was whether or not to use foil. For me, the answer was a definite yes.
Foil makes it cook faster and makes it more tender, both of which I think are a huge advantage. With the benefits, why might someone choose not to use foil? The answer is bark.
Bark is the crispy crust that develops on the outside of barbecued meat. It’s created due to a combination of direct heat and evaporative cooling. It’s awesome because it adds a different level of flavor and texture to already good meat. In a thicker cut of meat like brisket or pork shoulder, it’s hard to overdo the bark. Yet in a really thin meat like ribs, I think it’s easy to have too much.
In ribs, a little bark is a great thing, but a lot of bark creates a dry, chewy rib. If you really like bark, then leave the foil off completely. It still tastes good, but for me, it seems a lot closer to jerky than barbecue. If you don’t like bark at all, then leave the foil on for the whole cook. It’ll cook faster and you’ll end up with really juicy meat. My favorite method is to cook it in foil for half the time, remove the foil, then finish the cook.
After rubbing the rack of ribs, place it on top of a piece of heavy-duty foil that will completely fold over the whole slab. Then, add a couple tablespoons of water to help create steam. Finally, wrap the foil around the ribs, pressing out as much air as possible.

Really try to wrap them nice and tight. Minimize air as much as possible.
Setting Up the Cook
I experimented with cooking ribs two ways: in the oven and on a propane grill. A charcoal grill would be my preference, but I only have a really tiny Weber Smokey Joe. It’s a great grill, but it’s really hard to keep running at a low enough temperature too cook ribs correctly.
To cook ribs, you really want your cooker to sit at 225F (110C). If you use an oven, this is really easy. Set the temperature, place a tray on the lowest rack to catch drips, then just set the meat on the upper rack.

This is a lot harder outside. Most grill thermometers are terrible, so you really have no clue at what temperature your grill’s cooking. During this whole cook, my grill thermometer read somewhere over 300F while my really nice probe thermometer never went above 240F.
If you really want an accurate cook, you need to get a probe thermometer and keep an eye on the temperature of your grill. You should do a practice cook beforehand on an empty grill in order to figure out what temperature it is. I guarantee it behaves differently than you think it does.
If you don’t want to measure your grill temp, just know that you probably need to run your grill about as low as it will go.
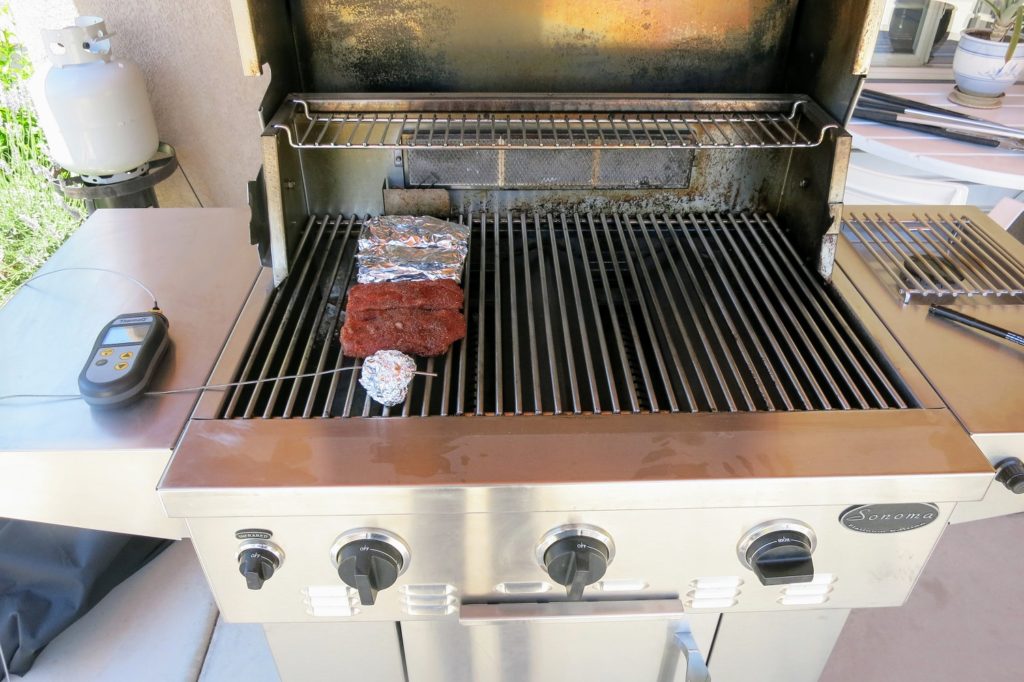
In the above picture, I turned on the middle and right heat elements to full, closed the lid, and let it run for 5 minutes. That brought the grill to 250F. Then, I put the meat as far to the left as possible, turned off the middle flame, and reduced the right flame to med-high. So, I had 2 of 3 flames off and the far heating element below full, and it still made my grill sit at 225F. If your grill’s smaller, you’ll need even less heat. So, just know that if you’re looking to cook ribs to perfection on the grill, keep it really slow.
Why even bother outside then? I mean, why bother grilling anything?
It’s fun. And it tastes good. It gives it a nice, smokey flavor that you just cannot get in the oven. You can boost this smokey goodness even further by placing a disposable pan on the hot side of the grill under the grates. If you aren’t using foil, add some wood to the pan at the beginning of the cook and just let it smoke out. If you are using foil, add the pan and the wood right after you remove the foil.
Oven ribs won’t have this flavor boost, but they’re still really good. Bonus, you can make them in the winter. The oven version of these ribs were still some of the best ribs I’ve ever had.
No matter what method you choose, commit to it taking a good amount of time. It’s a 4-6 hour cook. I always plan for 6 and if they finish early, I’ll reheat them in the oven for dinner. So get it going, drink some whiskey, and keep an eye on it. They’re worth the time.
Removing the Foil
After about 3 hours at 225F, it’s time to remove the foil. Take the slab of ribs out of the oven/grill and take off the foil. There should be a nice pool of fat in there. I recommend you save that to cook potatoes. Pork fat is delicious.

Once you’ve removed them from the fat, return the meat to the grill/oven and cook for 2 hours or so. The total cook time will be anywhere from 4 to 6 hours. Yes, I know that’s not very precise. Sorry.
It’s because it depends on a variety of factors. When you’re slow-cooking ribs, you’re really trying to slowly dissolve all of the collagen, or connective tissue, in the ribs. The fattiness of the meat is a factor. How the animal was raised is another factor. The length of the brine. The precision of your cooking temperature.
So… 4-6 hours. Plan for six. Check it somewhat regularly. If they finish early, keep them warm in a low-temp oven or reheat them when it’s time for dinner.
The second time you make them, you’ll have a much better idea of how long it will take.
For me, I know it tends to take 5 in the oven and a little longer in my smoker.
When are the Ribs Done?
Usually, I’d tell you to buy a good thermometer and take the temperature of the meat.
This doesn’t really work for ribs. The bones insulate the meat, so you’re not going to get an accurate reading. Instead, pick up the rack of ribs from one end and let them bend.
If they crack like that, that means they’re finished. It means the meat is ready to fall right off the bone.
Now your ribs are cooked. There’s only one more thing…
Sauce.
Should you sauce your ribs? And should you sauce them while cooking them?
People fight over these questions. I like sauce, but I’m not a fan of using sauce during the cook. I tried 4 different comparisons between sauced and not and it wasn’t worth the trouble in any of them. To sauce the ribs, you take them out of the cooker and apply a coat of sauce to the meaty side. Then you either turn the grill on high or the broiler on high. Then you cook it with the saucy, meaty side towards the heat for 1-2 minutes to caramelize the sauce.
I don’t think it’s worth it at all. It’s a huge mess, it likes to burn, and it doesn’t provide much benefit. I tried caramelizing one set with a kitchen torch and that one worked. So if you have a torch, you could give that a shot. For me, I still don’t think it’s worthwhile. Choose a good rub, cook the meat low and slow, and then serve it with a good sauce on the side. If people want sauce, they can apply it themselves.
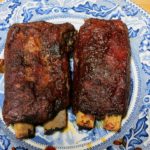
Afterthought – Why Foil?
I know I talked about it above, but here’s why you should consider using some foil.
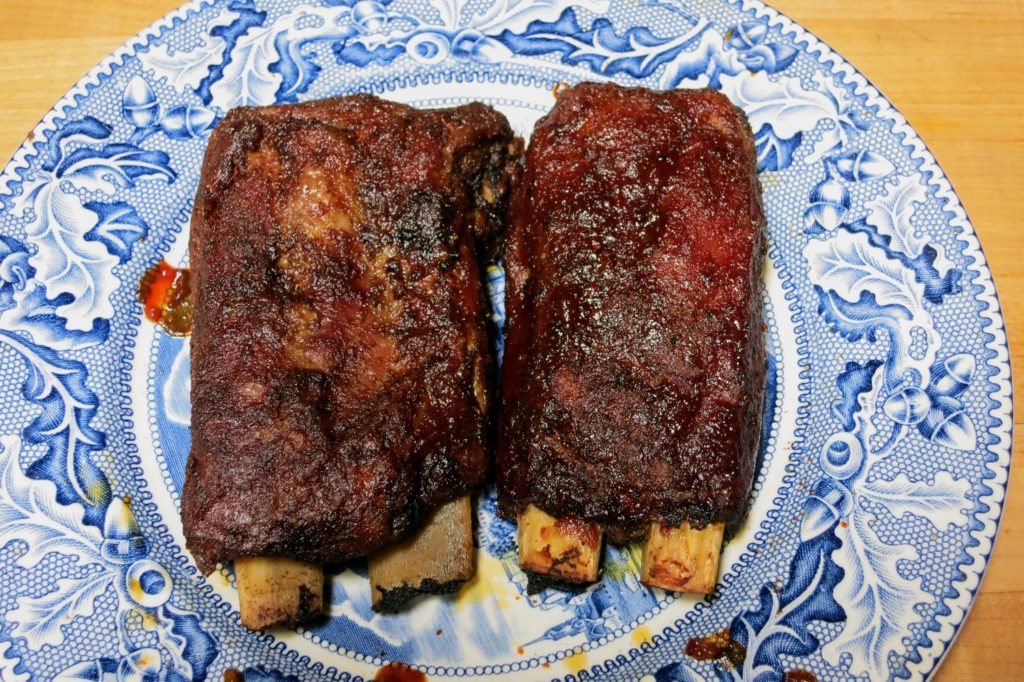
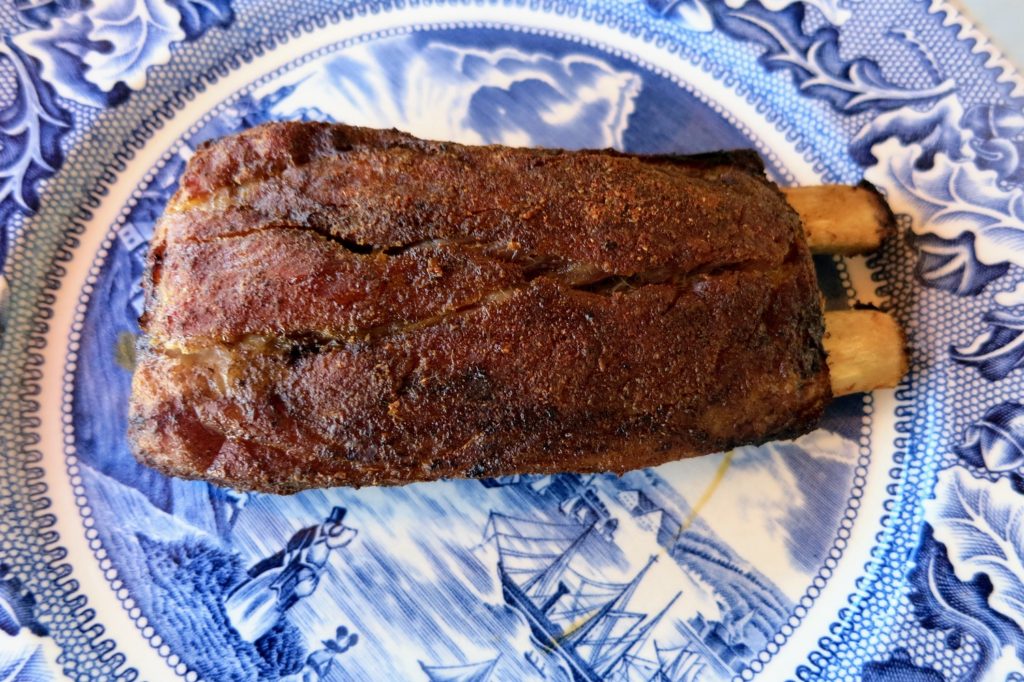
Those ribs were cooked with foil. They’re delicious, succulent, and so tender that some of the bones literally fell out of the meat. They had just enough bark to provide some good texture.
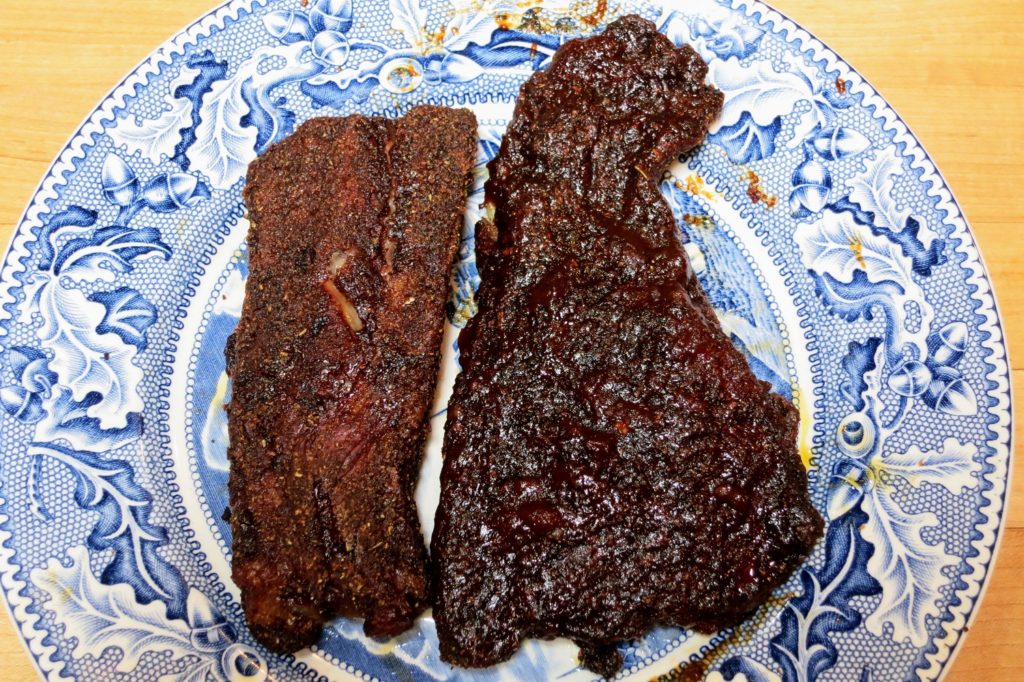
The ribs on the right were cooked completely without foil. They had a touch more flavor, but they were closer to jerky than ribs. They were much drier and the bones didn’t fall out of the meat.
So I’ll keep using the foil. I know it’s not as healthy or as good for the planet, but I only make ribs a few times a year. So when I choose to make ribs, I’ll keep using the foil.
Serving the Ribs
Ribs aren’t hard if you know what you’re doing. You don’t really even need a grill. All you need is some good meat, a tasty rub, a piece of heavy-duty foil, and a bunch of time.
Serve with a side of coleslaw or some delicious elotes, drink a beer, and enjoy the sun.
The Best Pork Ribs
Ingredients
- 2 racks pork ribs spark or baby back
- kosher salt 1 teaspoon per pound
- 1/2 cup rub see note*
- 1 cup barbecue sauce see note**
Instructions
- If your ribs still have a good layer of gristly fat on the back of the bones, pull off as much as you can. Then evenly sprinkle the kosher salt onto the ribs, about 1 tsp per pound. Let the ribs brine in the fridge for 1-24 hours.
- Remove the ribs from the fridge and evenly coat them with your chosen rub. Get a good coat all over the meat of the ribs.
- Place the ribs on a sheet of heavy-duty foil, big enough to completely wrap the slab. Add a couple of tablespoons of water and then wrap the ribs tightly in the foil, trapping as little air as possible.
- Place the ribs in the oven or on a grill at 225F. See below for how to set your grill to about 225F. Let the ribs cook at 225F, undisturbed, for 3 hours.If using an oven, place the ribs on a rack in the middle with a baking sheet underneath to catch the juices.
- Remove the ribs from the heat and then take them out of the foil. Place the ribs back on the heat at 225F for another 2 hours.If you're cooking on a grill and want to add smoke, do this now. To do this, place a disposable pan with some wood pieces underneath the grates on the hot side of the grill.
- You'll know the ribs are finished when you pick the slab up from one side and the bend in the slab causes the surface of the meat to crack. Remove from the heat and serve with a side of barbecue sauce.